![]()
This is the print version of this page. All content is copyright Indezine.com 2000-2026.
![]()
Definitions and resources for terms and techniques used in the world of presentations
See Also:
PowerPoint and Presenting Notes
PowerPoint and Presenting Glossary
Presentations Glossary in alphabetical order:
A |
B |
C |
D |
E |
F |
G |
H |
I |
J |
K |
L |
M |
N |
O |
P |
Q |
R |
S |
T |
U |
V |
W |
X |
Y |
Z
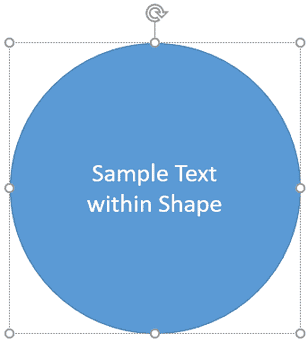
Text is probably the most important element on your PowerPoint slides! You may have heard the adage that a picture is worth a thousand words, but more often than not, that picture needs a caption to be understood better, and even when there are no captions, a narrative is required. And that narrative is text too. Text can be added almost everywhere within PowerPoint slides from placeholders and text boxes to the Notes Pane. Additionally, you can also add and edit text within any shapes except connectors, including straight lines.
To learn more, choose your version of PowerPoint. If we do not have a tutorial for your version of PowerPoint, explore the version closest to the one you use.
Text within Shapes in PowerPoint 2016
Text within Shapes in PowerPoint 2013
Text within Shapes in PowerPoint 2010
Text within Shapes in PowerPoint 2016
Text within Shapes in PowerPoint 2011
Tutorial Code: 06 09 01
Previous: 06 08 01 Creating Curved Shapes in PowerPoint
Next: 06 09 02 Rotate Text 180° Within Shapes in PowerPoint
Filed Under:
T
Tagged as: 06-09, PowerPoint Tutorials, Shapes, Text in Shapes
Comments Off on Text in Shapes: Text Within Shapes in PowerPoint
When you insert any shape into your PowerPoint slide, more often than not you will want to make some changes to the default shape that you end up with. Mainly, you may want to resize and rotate the shape.
This is something we do a lot in our everyday life, like rearranging our work desks, or even changing the position of our favorite chair so that we feel more comfortable. Similarly, all objects on your slide need to be arranged in a way that feels appropriate, rotation is one way of making this change happen.
Filed Under:
B
Tagged as: 06-01, Basics About Shapes, PowerPoint Tutorials, Shapes
Comments Off on Basics About Shapes: Rotate Shapes in PowerPoint
When a shape is inserted into a PowerPoint slide, its default appearance is related to the points that it contains. Alter the points, and you can change the original shape to anything you want. PowerPoint’s native Edit Points tool makes it almost a drawing program that provides you the option to play with vertexes (points), handles, etc. This is very similar to what you would do in Adobe Illustrator, CorelDRAW or another drawing program. By using the Edit Points tool, you can change a rectangle to a rhombus, or even edit a curved or freeform line differently.
To learn more, choose your version of PowerPoint. If we do not have a tutorial for your version of PowerPoint, explore the version closest to the one you use.
Edit Points for Shapes in PowerPoint 2016
Edit Points for Shapes in PowerPoint 2013
Edit Points for Shapes in PowerPoint 2010
Edit Points for Shapes in PowerPoint 2007
Edit Points for Shapes in PowerPoint 2003
Edit Points for Shapes in PowerPoint 2016
Edit Points for Shapes in PowerPoint 2011

Tutorial Code: 06 14 01
Previous: 06 13 04 Drawing Scribble Lines in PowerPoint
Next: 06 14 02 Add or Delete Points (Vertexes) for Shapes in PowerPoint
Filed Under:
A
Tagged as: 06-14, Advanced Drawing Techniques, PowerPoint Tutorials, Shapes
Comments Off on Advanced Drawing Techniques: Edit Points for Shapes in PowerPoint
There are many different types of shapes PowerPoint provides, and you can format these shapes by resizing, rotating, flipping, etc. Other than these basic formatting tasks, you must explore the yellow square handles. When you select most shapes in PowerPoint, you can see eight resizing handles and a single rotation handle.
To learn more, choose your version of PowerPoint. If we do not have a tutorial for your version of PowerPoint, explore the version closest to the one you use.
Manipulating Shapes by Dragging Yellow Handles in PowerPoint 365
Manipulating Shapes by Dragging Yellow Handles in PowerPoint 2016
Manipulating Shapes by Dragging Yellow Squares in PowerPoint 2013
Manipulating Shapes by Dragging Yellow Handles in PowerPoint 2010
Manipulating Shapes by Dragging Yellow Handles in PowerPoint 365
Manipulating Shapes by Dragging Yellow Handles in PowerPoint 2016
Manipulating Shapes by Dragging Yellow Handles in PowerPoint 2011

Tutorial Code: 06 02 02
Previous: 06 02 01 Change One Shape to Another in PowerPoint
Next: 06 02 03 Format Painter in PowerPoint
Filed Under:
A
Tagged as: 06-02, Advanced Shape Techniques, PowerPoint Tutorials, Shapes
Comments Off on Advanced Shape Techniques: Manipulating Shapes by Dragging Yellow Handles in PowerPoint

Glenna Shaw’s husband nicknamed her the PowerPoint Magician because she loves the “magic” of PowerPoint. Glenna likes to use PowerPoint’s native audio and video features to create Flash-like effects. She calls this technique “PowerPoint Sleight of Hand”. Because of her quirky sense of humor and her advanced skills, Glenna is frequently sought out for her expertise on presentations, training and desktop publishing. Glenna teaches classes on a variety of topics nationwide.
Here’s a list of links on Indezine.com where she has been featured:
 Selling Stockholm with iPads
September 24, 2012
 Outstanding Presentations Workshop 2012: Conversation with Ellen Finkelstein
September 13, 2012
 Dynamic Content Transitions in PowerPoint 2010: Conversation with Glenna Shaw
November 4, 2010
 Crystal Xcelsius: Conversation with Glenna Shaw
September 16, 2006
 Glenna’s Treasure Trove
June 13, 2005
How Do I Loop Sound/Music For a Looped Presentation
August 23, 2004
The Incredible, Accessible Presentation
March 05, 2004
Craft Your Content With A KISS
February 14, 2004
Filed Under:
G
Tagged as: Accessibility, Glenna Shaw, MVP, PowerPoint
Comments Off on Glenna Shaw
Microsoft and the Office logo are trademarks or registered trademarks of Microsoft Corporation in the United States and/or other countries.